Introduction
In the first part, a lot of basic concepts of certificates where explored like the differences between private and public keys and the overall mechanic of SSL.
In this part, the idea is to explain how a self-signed certificate works and the drawbacks.
To explore this example I’ll be using IIS (Internet Information Services). It shouldn’t be very different from other web servers.
Creating a Self-Signed Certificate
To configure SSL with a self signed certificate, the process is very straightforward. Opening IIS Manager and selecting the local computer, you will see the certificates option.

Double clicking the certificates, you can see in the right hand side the “Create Self-Signed Certificate”, in the action list:

You have to inform a friendly name and a certificate store.
- Friendly Name: Just a name to refer to this certificate later so you can find in your certificates list later.
- Certificate Store: Apparently the only difference here is that the Web Hosting Store can handle more certificates than the Personal Store.
One you created, you will see the certificate in your list.
So what?
That is the difficult bit. Understand what is going on.
So, first, if you go to Control Panel | Manage computer certificates, you will see all the certificates you have in this machine. And if you browse the “Web Hosting” store and certificates, you will see the certificate you generated. Another very important thing is the icon. If you see the little key here, it means you have the private key for this certificate (Remember, private key, from the part 1? That thing that allows you to decrypt something encrypted with a public key?).

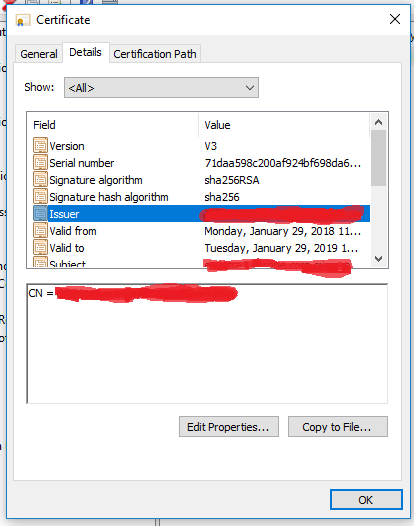
If you double click this certificate you will also see some interesting information, like who issued the certificate. In this case, a self-signed certificate you will see the machine name where the certificate was generated there.
Now, if you need to setup the bindings for your IIS connection. Right-click the “Default Web Site” (or whatever web site you are setting up) and click Edit Bindings | Add.
Then when you access you website (I’ve configured on port 444) with localhost from the machine you generated the certificate you will see everything should work, right? Wrong:

What happens here is that I access the website using localhost. The certificate contains the host name of the machine, so, this is one of the validations of SSL.
If I access through the full qualified domain name, no error is prompted. So, everything works fine.
If I access the same website with the right host name from a different machine, I’ll get a slightly different error:

You notice here that the error is not invalid host, but invalid CA. This is because this certificate is a self signed certificate. So, the machine has no idea who this CA is (because the CA is the machine that issued the certificate). If you don’t understand how the validation of the digital signature by a CA works, please, refer to part 1.
What if I don’t want this annoying message?
You have to “trust” the CA that issued the certificate.
To do that, first you need to get the certificate. You should go back to the machine you created the certificate, Settings | Manage Computer Certificates | Web Hosting | Certificates. You then export the certificate. Just right click the self-signed certificate you generated, All Tasks | Export. There are different formats you can export the certificate. Usually a public certificate will be a DER encoded .cer file.
You should copy this file to the machine with the annoying message, double click on it and click “Install certificate”. You have options to import for existing user, or for the local machine (all users on this machine). You should select the store “Trusted Root CA Certificates”.
If you access again the web server, using the right URL and the same host name contained in the certificate, you won’t get the annoying message anymore.
What we did here is “manually” trusting the CA that signed the certificate.
What if I don’t want to trust the CA and I don’t want that annoying message?
You can’t to that and still be safe.
If this is for your custom Java or .NET application, you probably can bypass some of the SSL validation. And in your browser you can just click “proceed to this web site”. The drawback here is that your application or browser will trust whatever website it connects. You will be still sending encrypted information, but you can’t ensure the machine you are sending this information is the machine it claims to be. If there is a man in the middle attack, you can be sending information to the wrong person.
Some ways that it can be done is: if someone tampers your hosts file, you might be connecting to a website that is not the website you expect. If some malicious software also sets the proxy of your browser, this can be achieved as well. That’s why this approach is not recommended and this annoying message is there. This is definitely not an exaustive list.
